I wanted to upgrade firmware in my ESCs for very long time and only now I managed to do it, so I documented it as well (in case I will have to go back to it). There are plenty of alternative firmwares like SimonK, but BLHeli is now the most comprehensive actively developed firmware, it's mature in features, reliability (on old revisions enabling damping could burn down your ESC in mid flight) and convenience (it's really pleasure to use).
I was postponing this upgrade for very long time, worried that I will waste a lot of time (and always something goes wrong) for minimal gain and I was wrong, I experimented with GPS, optical flow tracking, sonars. But actually upgrading the ESC was very fast (everything worked as it should) and the improvement is extreme. So happy feelings from the new firmware, so smoother and quite and yet fast in response...
First I flashed the non-nfet version without damping just to see some improvement without any risk of burning and after 15min flight I was really impressed. Then I flashed the nfet firmware which allows damping and the result is awesome. People try to describe it in words, or in videos and there is nothing like to feel the difference yourself. Probably nobody regrets flashing the ESCs and I would recommend it to everybody.
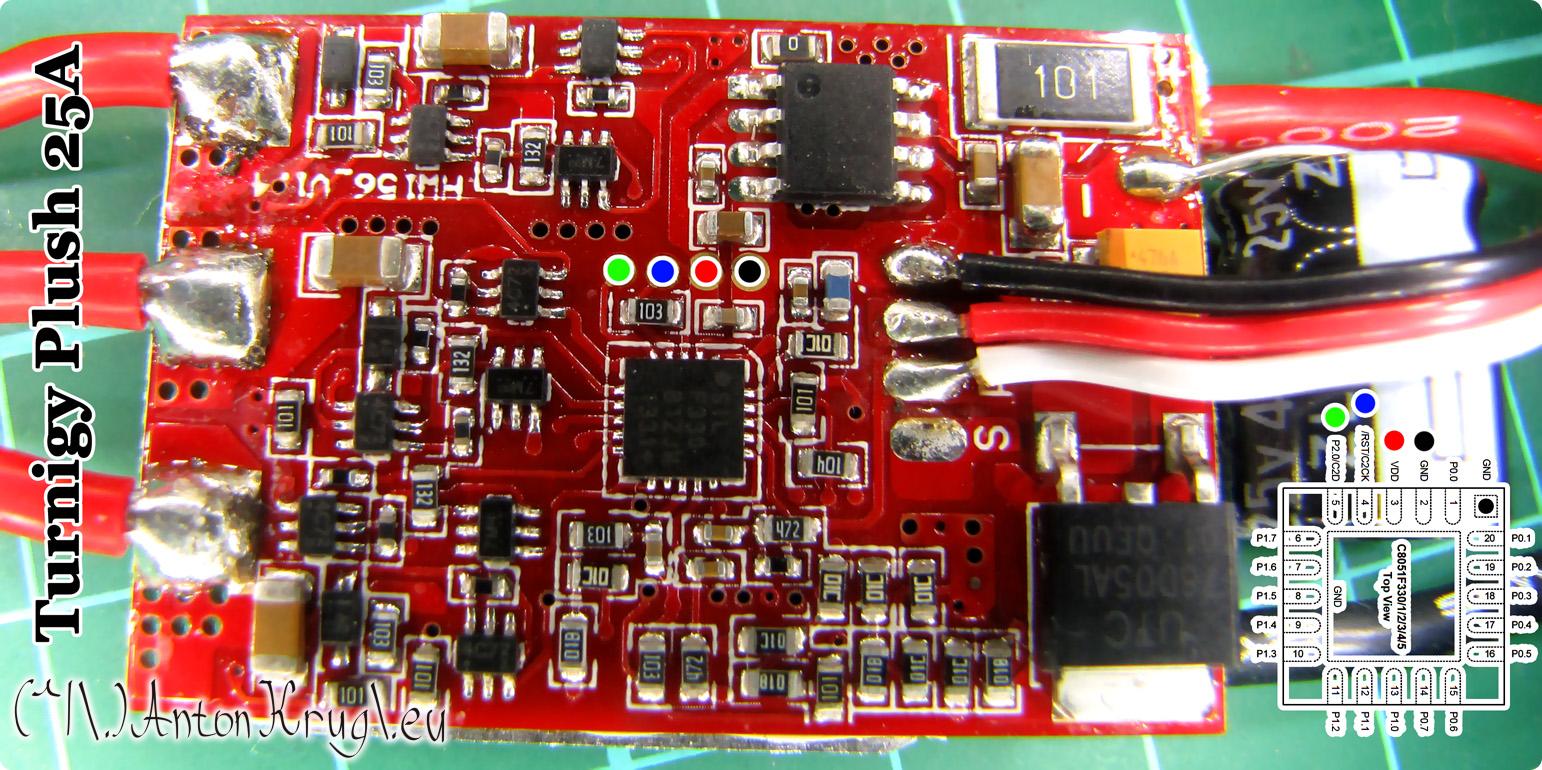
I have couple ESCs spare, so I experimented with spare one first. Removed the heatshrink tubing, confirmed the pins with PDF of the F330 CPU, labeled even power pin in red (which we will not use, we will power device directly from multirotor, or from battery, not from the programing interface).
This board is nfet version and is slightly bigger, compared to older model of this board which used pfet transistors. Nfet transistors switch much faster which allows faster timings without a risk of destroying the transistors. This faster timing can be used for damping feature which will break the motors when lower RPM command is given. The motors do not free roll anymore and when I tested it without props the response is instant to any RPM change, very impressive. Sounds wasteful but it's not as bad as somebody would expect, the increased control over the multirotor is well worth it. This feature is so desired that some ESCs even support regenerative damping.
Instead of soldering the pins to some header and modifying each board I decided to do less destructive and faster approach, creating a connector for these pins. Found few wires (note: they do not match colors of the diagrams) and soldered them to spring contact probes I had laying around. Then took bottle cap and hot glued probes to it, till the hot glue was warm I tried to test fit the probes and adjust them as I needed to make correct contact on the board. I needed to be careful because 1mm aways from the ground pin is the power, if I would shorcircuit the power rails by slight movement I could damage lot of stuff. But thanks to the probes which had special head they bite a bit into the copper pads and they will not slip if I applied the correct pressure on them. Flashing takes under 10seconds so it can be done pretty quickly.


Instead of hard to obtain and expensive Silabs Toolstick board to flash the ESCs just a regular Arduino can be used. I had Duemilanove spare, but many others are supported (look at BLHeli documentation). Connected the probe wires to the Atmel ISP connector, specificly to the SPI MISO/MOSI pins.
Downloaded BLHeli, at the moment of writing this article v16.0.14.5.1 is most recent. On bottom of the page are PDF links to supported ESCs and on top menu is link to manuals where all other flashing boards are described as well. Description how the BLHeli firmware works is in the application under BLHeli Info -> Manuals.
Opening the app I first needed to flash the Arduino, choosen Duemilanove (tried higger baud but only 57600 worked for me) and then clicked Arduino 4way interface.
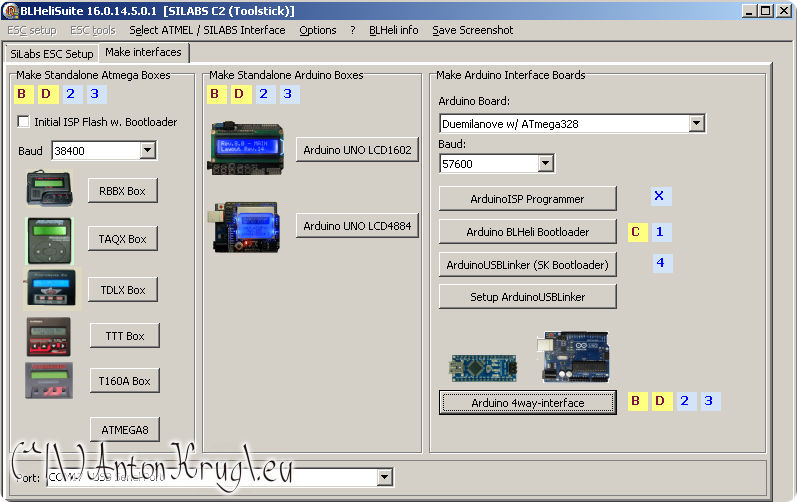
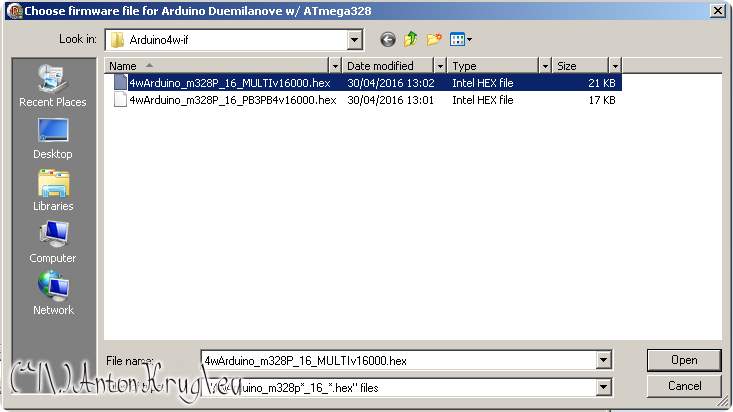
Then I choosen the PB3PB4 file, the MULTI is meant for configurations where you access multiple ESCs at the same time.
In "Select ATMEL / SILABS Interface" I selected option B.
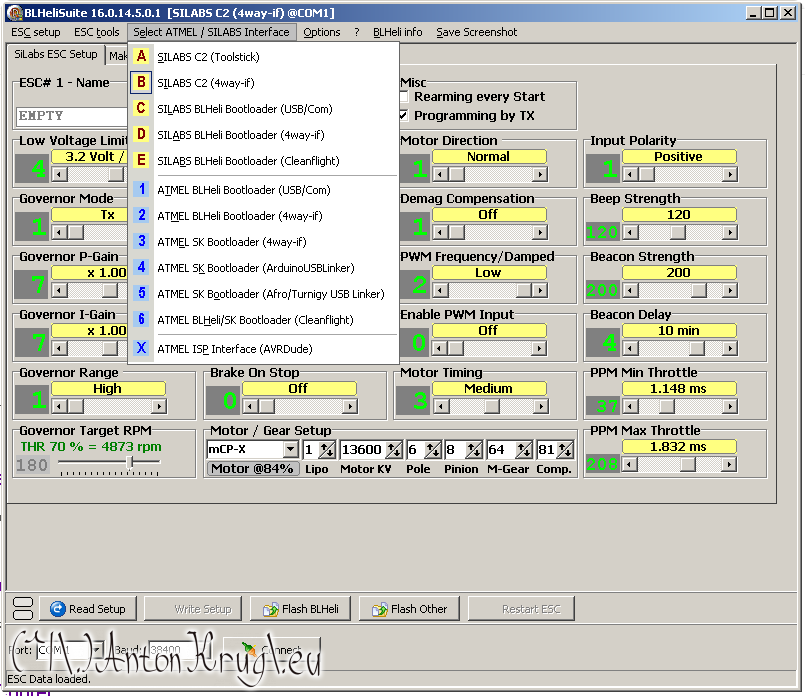
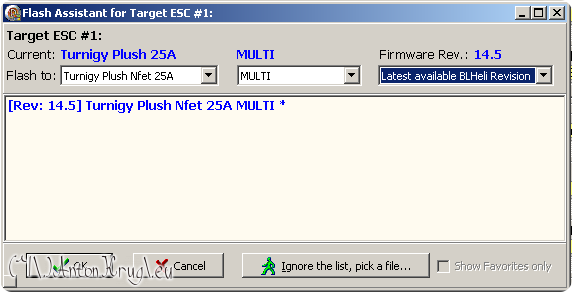
Then powered the ESC and connected my probes to it, clicked on Flash BLHeli on the bottom and chosen the Nfet Plush 25A (the non Nfet woudn't allow dampening). The MULTI means that it's for multirotors, the other versions are for helicopter's tail and other applications.
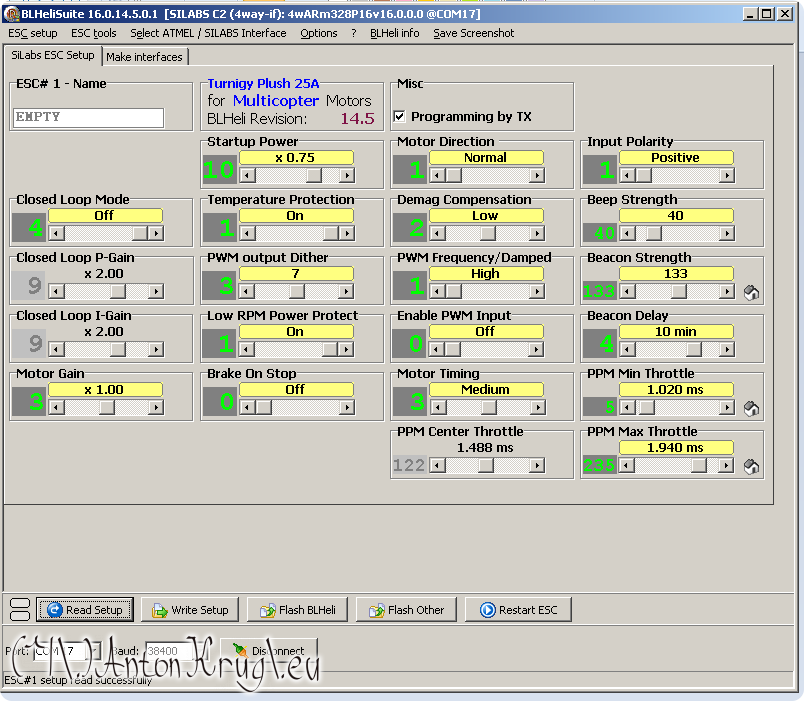
After flashing was working I clicked Read Setup. And left values at default (to enable dampening the PWM frequency/damped has to be set to 3).
When the setup was working I went to flash the real ESCs and instead of taking them apart and removing the heatshrink tubing I decided to do less destructive approach. Through the tubing I can see/feel the ICs, with them I can orient myself and do precision cuts to expose only the programming probe pins. It can be covered with electrical tape and still quickly accessible for the future if I will decide to change settings or update to newer version.
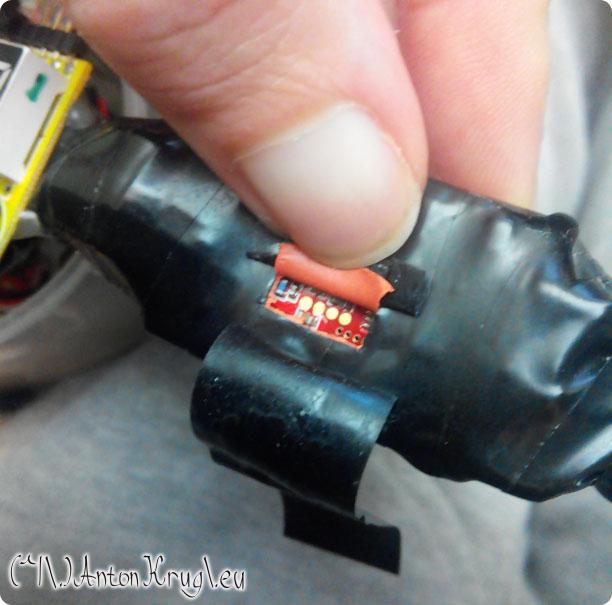
Plus now each ESC can be upgraded while it's connected to FC and fixed to the airframe so the whole process is painless and fast.
As last I calibrated the throttle on the ESCs. I personally prefer to connect all ESCs together to the same channel 3 (throttle) on my RX, put throttle to the max, power TX, then power ESCs. Wait for the beeps to register calibration and the lower throttle to minimum and again wait for the beeps to confirm. Then I power down everything and connect ESCs back to FC. If it didn't work, I would repeat the process and be more careful about the order, it's very important.
NOTE: If you value your eyesight or hands then probably you should remove props before doing anything mentioned above :-) Probably it would be nicer to mention it on the top, but you should still have some common sense and self-preservation desire without any direct instructions to be careful :p

